Showing posts with label crafty. Show all posts

Thursday, June 27, 2013

The Nest: What I made

I had so much fun preparing for Little Baby by crafting. I put together this post with tutorials that guided my creations. It will be nice to refer to later.

Gillian, 4 months
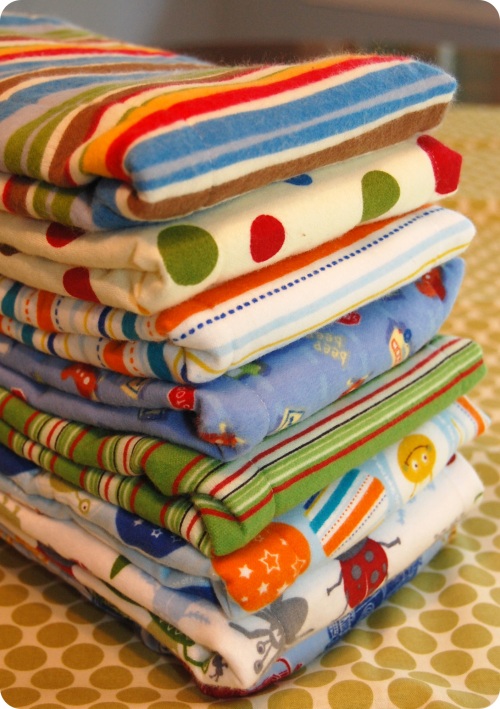
Crib Sheets with a Tutorial from Dana Made It
(she has the best tutorials) The first sheet I made is in the picture above. I looooove this seersucker sheet, but 2 yards of fabric doesn't always end up to be cheaper than the sheets at target. This one cost me about $15 of fabric. But, it is absolutely adorable. And I love my baby in this color so the pictures of her on this sheet are some of my favorite pictures.

I made 2 flannel crib sheets (I couldn't find ANY to buy online) from a grey twin sheet set that I got at target for $15. I even had fabric left over to put together a Sheet Protector to match (didn't have a tutorial for this, but it was pretty easy to just guess!) and a changing pad cover too. That was a great deal.
sheet protector


Gillian, 1 day old. Still in the hospital
Gauze Swaddle Blankets from Dana Made It, once again.
I even dyed one of them a beautiful teal color, which was very fun. BUT it was a little rough on Gillian's new-born skin and gave her a tiny rash on her chin during her first week of life.

4 weeks old
Changing Pad Cover
I actually made 3 of these. When Gillian was a newborn we would go through several in one day. The tutorial is pretty decent. It's my favorite way to sew: just trace, pin, and stitch. I hate to measure and iron and all that kind of sew-correctly stuff.

you've seen these pics. dyed this onesie orange

i love the kimono shirt - dyed it teal

Dyed White Onesies (and other stuff)
I wanted to add a little variety to my baby's onesie collection, so dyed some green and some teal and some orange. Did the same thing to burp rags.

made Dooney his own burp cloth with camo and hunter's orange
Burp Rags
These I just added flannel fabric to baby cloth pre-fold diapers.
I also received some of these as gifts. And I have used every.single.one. My baby is full of puke. Seriously is a pukey kid. Both of our moms were so surprised at how pukey she was especially as a newborn. Our doctor called her a "happy spitter", which just means that she pukes a lot but it doesn't make her mad or cause her to lose weight or anything. So she wasn't colicky or diagnosed with reflux, thankfully. She just pukes a lot.

little Chickadees on a piece of wood from the Wasatch. How perfect.
Door Sign
I grew up with a "Hannah's Room" sign on my door until I was a teenager. And I loved it. I wanted Gillian to have something for the front of her bedroom door as well. Landon and I found this beautiful wood blown off of a tree up Millcreek Canyon while we were hiking at the end of last summer. We collected it and I had in mind that I would paint something on it for our baby's room. I love how it turned out. And I love that it is natural. The perfect addition to her little Nest.

glider. Gillie, 4 or 5 weeks
Glider Slip Covers
These were the most difficult things to make. I could have made it easier on myself, possibly. I made these similar to the changing pad covers: trace, cut, pin, sew, velcro.... Surprisingly that tactic worked just fine. I love the way they turned out and they certainly add a lot of character to our Chickadee's nest (and it is wonderful to get to wash them - i can't believe how messy they get (see "Burp Rags" above).

Diaper Sprayer
Landon constructed a diaper sprayer for our cloth diapers. It has been a lifesaver. I've heard moms say that you don't need one until babies start eating solids. I disagree. You are supposed to soak your soiled diapers in water before you wash them. Instead of doing a soak cycle, or putting my diapers in a water pail (which is a drowning hazard), I just spray off the dookie-mess and then it remains wet until it is washed later that day or the next. The DIY sprayer is easy, although landon had a little difficulty coming by all of the pieces.

Breast Pads

I also made some other stuff like a cloth diaper, cloth wipes, hair thingies, car-seat strap covers, etc.... but that's about it.


Sunday, November 25, 2012

Little Baby: 32 Weeks

Wow. Is it really 32 weeks? These days I'm having a hard time keeping track, honestly.

Last weekend was spent in my hometown. We celebrated my mother's 50th birthday on Friday and on Saturday we had a multi-generational baby shower. My grandmother, mother, and I all invited friends and family. There were 25 women over all, and it was a beautiful celebration. It is really special to see good friends, and almost all of my grandmother's friends have known me my entire life, so it is great to celebrate this baby with them. 

mom-to-be with the hostesses

It was a beautiful and very special shower. My grandmother did a wonderful job making the most incredible food and my mother and sister decorated her home so sweet and planned a very fun craft. It was great.

By the way, i am still extremely surprised every time i see a picture of myself (like just now, looking at the picture above). I certainly feel pregnant, but i don't realize how huge i actually am until i see myself in pictures. I even still try to turn my body sideways to get through narrow spaces - ha! that's a joke! maybe i'll be used to being enormous by the time the baby arrives.

This week we celebrated Thanksgiving with dear friends. With 14 adults, a baby, and 5 dogs, it was a Thanksgiving to remember! This was our first Thanksgiving with friends - we have always been with family or just the 2 of us. Landon began the day skiing, which is the best way to spend any holiday. We certainly have a lot to be thankful for this year. And I am just amazed at how our lives have changed and will change in such a short amount of time. God's blessings are so abundant!

Thanksgiving morning our Christmas tree arrived on our front porch. The last 3 years we have used a pre-pay Christmas tree service from a local familiy. You buy it in advance and they drop it off on your front porch between Thanksgiving and December. It is sitting in our living room smelling gorgeous, but we have yet to decorate it as we have been pretty busy around here.

Yesterday Dooney took Duvick into the desert for some rock climbing and I stayed home and did some crafting. With less than 2 months until our due date, I'm feeling the pressure to get everything ready for Little Baby (is that pressure or just a nesting instict? Either way, it makes me pretty productive!). Now that my baby showers are over, I sat down and surveyed what I still need and tried to see what I could make myself.

I made a seersucker crib sheet a few months ago and decided that I should just buy the rest because they cost more to make than to buy (takes 2 yards of fabric). But I haven't been able to find ANY flannel baby sheets in stock in Target or online. (imagine taking however many minutes it requires to finally soothe a baby to sleep and then place her on a cold cotton sheet. No way! This winter Baby requires flannel!) So I just bought a pair of flannel sheets that were on sale for $15 from Target, and was able to make 2 crib sheets out of that AND a changing table cover. I think I will be able to make another sheet from the remainder (but feel a little guilty giving Baby Girl 3 GREY crib sheets). I need at least 4 sheets since our baby's daycare requires 2 sheets there and i'm sure we will want more than 1 at home as well. Baby sheets are extremely easy to make with Dana's awesome tutorial.  


It's extremely satisfying to be making things for our baby. I really do sit there for hours and think about her as I sew. It's therapeutic for me and makes me feel like I am already being a good mom to my girl. Her nursery doesn't really have any colors or theme yet, although it does in my mind. I think of it as a grey/white/ room with a birdy theme. In reality it's just the room where we keep all of our baby junk so far. I know that grey and white isn't very exciting, but i really wanted a soothing space for our baby, with soft colors. We can go nuts creating a bedroom with tons of color for her once she has opinions about that sort of thing, but for now, I'm just envisioning a very peaceful place for her first year. 

We ordered a dresser that should arrive in the next couple of weeks. So hopefully by Christmas I'll have the nursery better situated with her things laundered and organized in boxes and drawers. I'm excited for that. 

Still on my list of things to make: cloth diapers, cloth wipes, nursing pads. These are each things that I already have in stock - I've received some as gifts and have made some of my own. Yet, I still require more. So those are on my crafting list. Maybe if I can get those done by Christmas I can start to create really FUN things for our little girl, like leggings and hair bows. Maybe by then we'll have a name picked out for her...

Wednesday, October 3, 2012

Getting the Craft on, Baby

Now that the Baby-moon is over and we are more than half-way through this pregnancy, it's time to start really getting ready for baby. No names picked out yet. The "nursery" is still Dooney's office, although we hope to move him into his new office in the next month. That will be a difficult move, as we will have to totally move around and re-coordinate 3 of the 5 rooms in our house (our bedroom and kitchen will remain the same). 

So far have a crib AND a mattress, and a glider. The only other thing we're looking for is a dresser, so I'm thinking it won't take too much more to get the nursery together. But what do I know? I've never done this before...


I found this glider at a children's consignment shop for only $30.

Upon closer look, this thing is covered in all sorts of stains - they look mostly of the milky sort. The cushions don't fit in the washing machine, so I decided that I would cover them. 


My sister donated a cute Ikea fabric to me that she couldn't find a use for. It just happened to be the perfect amount to cover the chair! Amazing. I thought that covering the cushions would be difficult, but I'm pretty good at simplifying projects as long as I don't desire perfection. I basically just traced the cushions onto the fabric  and put then together with a straight stitch. I used velcro so that whenever we get spit-up or milk or whatever else on this chair, we will be able to take the covers off and wash them.

I am really happy with the result. 

These little sewing projects make me feel like I'm better preparing for our baby. Although I know that putting together a nursery doesn't prepare you for parenting any more than planning a wedding prepares you for marriage. But, similar to marriage,  I guess, the only thing I can really do to prepare is read and pray. It will  probably be similar in that you figure it out as you go... and mistakes are learning opportunities. And I have a wonderful partner in this.

Sunday, July 24, 2011

Harry Potter is kind of a big deal around here

Doons and I were not two of the bazillion people to see the midnight showing of the final "Harry Potter" movie (we're way too old for that kind of thing these days!). But we do love the movies, and we saw it opening week. And in order to get us ready, I made us t-shirts of the Deathly Hallows.
(oopsie, dooney's is a little crooked)

 It was easy. I just printed out a Deathly Hallows symbol that I found on the internet.


Then I took FREEZER PAPER and traced the symbol onto it and cut it out exactly. 

Did you know that freezer paper can be ironed on to fabric easily? It can. It was my stencil.


I painted a couple layers of white fabric paint within my stencil and the next day I just peeled the freezer paper off of the tshirt. Very easy. 

Wait. 

Before you think I'm too awesome, you must know that I simply followed Dana's instructions. Her tutorials rock.

And that's pretty much the only craft I've done in the past two months. 

Sunday, March 27, 2011

Nothing New

Sorry for the lack of posting and THANK YOU for the sweet comments on my blog post last week.

Nothing much new is going on here. Work and skiing dominate our lives for the most part, which is a nice balance to attempt to maintain.

We had a wonderful friend come and visit for a few days last week, which was great.

Landon's been on Spring break and the mountain received FOUR FEET of snow in the last week, so we have been loving that. Today was one of the first days that I feel like I have been able to ski powder well. I had about 5 major spills and was extremely exhausted by 2pm, but besides that, i felt like i was floating on a cloud most of the day. It was amazing!

I went to a baby shower of a girlfriend yesterday. It was nice to spend time with women and celebrate her and her coming-soon baby girl! I've spent several hours during my evenings these last couple of weeks sewing for her shower. I was very happy with the way that things turned out. And wow, baby onesies are not easy to work with - so very tiny!

Here are a few tutorials for some of the baby things that I made:

burpcloths

Sunday, February 6, 2011

Weekend Crafting

I'm starting to looooove weekends a little more than all the other days. I can't understand how our society only allows weekends to last for 2 days. Seriously, I'm perplexed by the standard of our work/actual living ratio in our society. I understand that our work is valuable - especially mine - I love my job. I'm just not sure this is how my life should be lived. Especially for the next....40ish years.... but that's another blog for another time...

I wanted to share with you my brilliant spur-of-the-moment sewing project from the weekend. I'm so proud of this thing.

A few years ago, my sweet husband gave me a coffee press for Christmas.
It was an especially sweet gift because Landon knows that I love coffee and he doesn't drink a lick of it. What a thoughtful gift!

It brews two cups (read jumbo-regular-size) of the best coffee ever. Only, by the time I get around to my second cup it's usually cold. See, I only use my french press on weekends, because I have time to enjoy a slow brew. During the week, my machine brews 3 cups in 2 minutes and I pour it all into a thermos and take it to work.

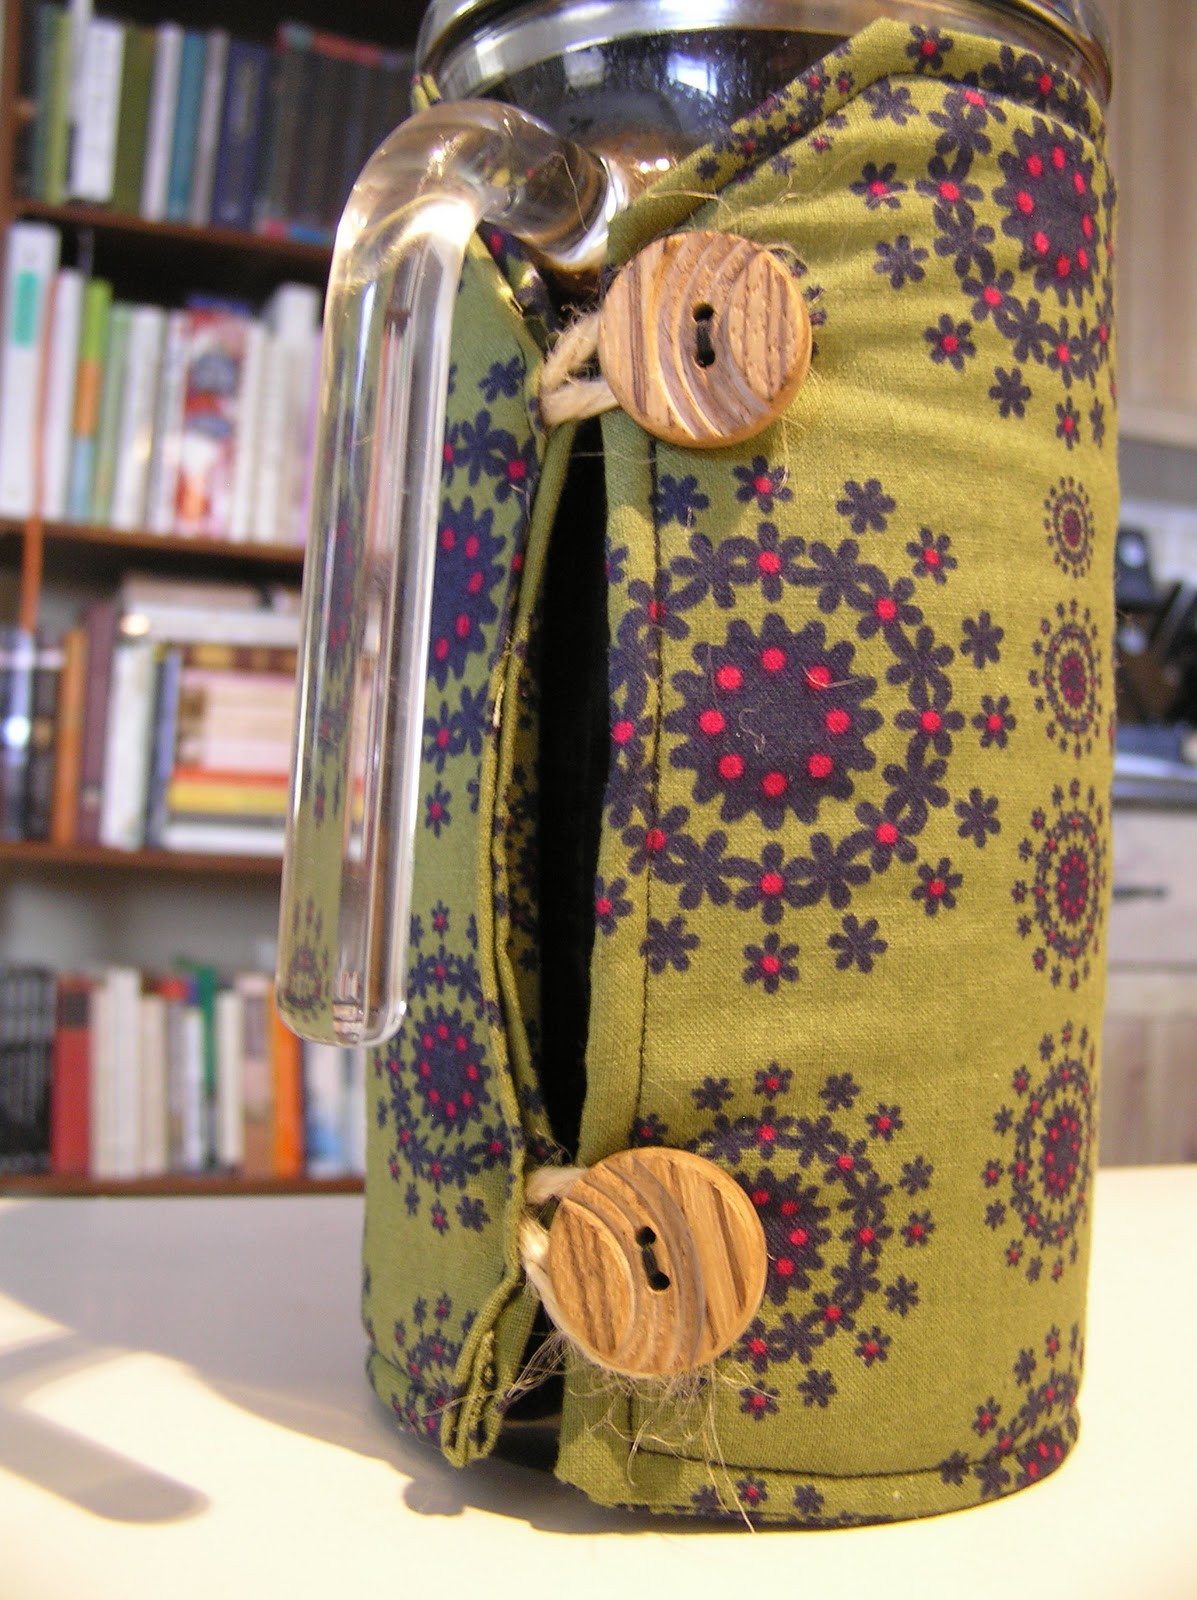
So this weekend I tossed together (literally took me 30 minutes!) a coffee cozy. It was fun and easy to put together the pattern - the thing's a rectangle, after all. (Does this fabric look familiar?) While I was at the fabric store getting some items for my REAL weekend craft (will share that later), I picked up some insul-brite. THIS IS THE KEY INGREDIENT to anything that needs to be insulated.

Quick steps:
1. Measure the width and hight of your press and transfer that to two pieces of fabric that should be rectangles.
2. Sew the fabric with pretty sides together leaving one side open.
3. cut a piece of insul-brite to fit the fabric
4. Turn the fabric right-side out
5. insert insul-brite and finish the opened seam
6. Run a quick seam around the edge of the rectangle to make sure the insul-brite is secure inside of your pretty rectangle. Finished!

Easy, right!?

I just put some rope and buttons on there for an easy closure, but you could use velcro or even sew the two ends together and slip your press inside of it, so there is no opening at all.

I love how it turned out. And even better, my coffe was steaming-hot to the last drop!

Sunday, January 30, 2011

self indulgent shirt


While I was busy making Christmas crafts for so many months, Landon brought to my attention the fact that I had never made myself anything nice. I've crafted a lot of fun things, but things that were only extremely practical - like panty liners and grocery bags. So I decided to take on his challenge and create something special just for me. 

As I have been LOVING the sewing crafts by Meg McElwee  in her book Sew Liberated, I thought to renew my library rental and dish out a cutie project for myself. I had already made a beautiful day bag for LeeAnn for Christmas and a flannel Duvet cover from other patterns on her book. To treat myself to something special, i decided to go with the "Blossom Blouse"

This was an easy project and since I am such a novice sewer-person, I learned a lot of new techniques - like sewing with elastic, for one. If you want to enjoy some fun projects, look into Meg's book. It's awesome. 

Tuesday, January 18, 2011

Starbucks apron refashion

It was finally time.

Knowing I was entering 2011 with a full-time job, plan B was finally ready to be removed from the back-burner and tossed into the trash. Returning to Starbucks as a last resort, was no longer a last resort. I had been keeping all of my Starbucks clothes in a bag in my garage knowing that it was a possibility for me to work there again.

Like I said, no longer.

So I emptied the bag and donated the clothes and got a little Christmas-creative with my old aprons!

The apron, worn and weathered, and dearly loved and laundered.

Christmas cooking is much more fun when one is donning a Christmas apron. 
Aren't they cute!?
These were sooooo fun to make!


Thursday, December 30, 2010

Christmas craft reveal - shoulder bag

Well, now that Christmas has been celebrated, I can FINALLY share with you some of the crafts that I have been working on this month. I've had so much fun making hand-made gifts this Christmas. I hope that the receivers of these gifts love them!

This shoulder bag is the most difficult thing I've attempted at making so far. It was a lot of fun. I got the pattern and instructions from a book I rented from our library, "Sew liberated" by Meg McElwee (see her blog here). She's a talented and brilliant crafter. 

Her instructions were easy to follow. I had to improvise a bit on the pattern and i totally rejected adding piping to this bag - it was tricky enough for me at it's barest form. 

I had a lot of fun picking out the fabrics for this. My sister, LeeAnn, is so cute and is soon to be a mom of two so I thought that a cute bag would be perfect for her. These fabrics reminded me of her.

The applique technique is something new to me (along with pretty much everything else involving this bag). I played around with a lot of different ideas and then just decided on these fun shapes. It might be a little more my personality than hers, but I still hope she'll like it. I used the Fusible Web material. See a previous winter craft post for the technique.

The bag ended up a lot bigger than I thought it would.

I hope LeeAnn loves this bag. I am happy just thinking all the wonderful things she could fill it with. Being a youth pastor, active woman, and a mommy, i'm sure there is no shortage of stuff to be toted around.

Wednesday, December 29, 2010

The Button Necklace

note: blog written on Dec. 9, 2010 - but is published with a "do not open until Christmas" date.

I admit, that while the husband has been locked in his study for weeks now (don't you just love the end of the semester?), I have been indulging myself in things that he doesn't usually enjoy. This includes putting up Christmas decorations, working, hanging out with mormon missionaries, CRAFTING, and watching movies like "Handmade Holidays with Martha Stewart". 

Yeah, that sounds funny. But I found this craft on that video with Martha and thought it would be a great craft idea for my grandmother's Christmas gift. I found a link on Martha's website with instructions.

This necklace took 7 yards of red nylon beading string and about 100 buttons. 
I found a wonderful deal on some beautiful buttons at THIS and THAT etsy shop.

I thought some tight rosettes out of white flannel would balance this really long necklace.

I found this great "clasp" at my local beading shop

Here's a shorter version with green nylon beading thread

Tuesday, December 28, 2010

Christmas scarf

I made a Christmas scarf for both my mom and my sister. They are even the same style, although my mom's is about half the width of my sisters'.


During my time home this summer, Mom and Nell and I were shopping and they really liked these scarves that I would't let them buy because I swore that I could make them for way cheaper. These aren't exactly them - those were summer scarves - but these have a similar idea with the surplus of ruffles.
This craft was fun. I'm not sure if it is done the best way - I just conceptualized and designed the scarves myself and hoped they would turn out okay. They're a little crazy, but I like them. I hope Mom and Nell like them too.

Monday, December 13, 2010

The Christmas Wreath


This weekend I finished my Christmas decorating. I strung our lights on the outside of our house and put together this wreath for our front door. It's pretty lopsided, but I like it like that. I like the disorganized, haphazard look of it.

When the husband was trimming the bottom branches off of our tree, I asked him to toss them on the front porch so I could put them on a wreath. 

 
Cheap supplies

I just cut the big branches into manageable pieces and wired them together.

Then I used the wire to secure them to the form

I overlapped each piece, securing each bundle all the way around the wreath. Doons suggested that I trimmed the longer stems to make the wreath look synchronized, but I didn't want stubs sticking out around it - I wanted the stems and branches to have their natural ends. I guess next year I could plan a little bit better to make it look a bit better, but I still like it. 

Thursday, December 9, 2010

Snowflake Pillow

Here is a VERY easy winter craft that I have enjoyed lately. My snowflake pillow. 

I used a brown and white flannel - just some left over fabric that I had. The snowflake I made using the famous and fabulous method of folding and cutting - like we did in elementary school. I found that flannel is much more difficult to cut than computer paper, so my snowflake is quite a bit out of balance. But that's okay.

Once the snowflake was cut and opened, I pinned it to my web interface.

My craft store sold this stuff by the yard. It was in reams just like the fabric. 
 
See how this material is just like a tight little web?

I pinned the snowflake flannel to the web interface and cut through the webbing right along the edges of the snowflake. After about 10 minutes with the scissors, I surrendered and just used a razor blade, which was much easier and quicker.

I don't have any pictures of the rest of the process, but it's just as easy as the first few steps. I took snowflake (still pinned to the webbing) and positioned it on my brown flannel as I wanted and ironed it on. Very easy.

Next, I sewed the pillowcase. I just sewed the fabric with the softer sides (and the snowflake side) inside of the pillow, overlapping the two ends of the fabric. When I turned it inside out, it looked like this on the back - a perfect little pocket to put the pillow inside. 

I'm loving making things snowflakey this year. If you didn't know, the snow bums out here are calling last month "Snowvember". For good reason - 140 inches in the early ski season is pretty close to miraculous. It's awesome.